Dual-Satellite Connection
Table of Contents
Some regions worldwide are covered by two satellites at the same time. Currently, there is extensive overlapping coverage in Asia from Telstar 18V C and Telstar 18V Ku. If you are in a region with overlapping coverage, you can connect to two satellites simultaneously and double the Bitcoin block transfer speed. This page describes the hardware and host configurations required to run such a dual-satellite setup.
Before continuing, however, you should check if your location has overlapping coverage from two satellites using our Coverage Map. Also, note distinct signal strengths are expected from each satellite, given that the distance and viewing angles from your station to each satellite are different. Hence, we recommend checking the Link Analyzer tool for more specific antenna recommendations for each satellite.
Required Hardware
A straightforward way to connect to two satellites simultaneously is to use separate antennas pointed to each satellite. To do so, you need two LNBs (one per dish), double the number of cables, twice as many connectors, etc., or two separate Sat-IP or flat-panel antennas. Nevertheless, receiving two satellite beams simultaneously while using a single parabolic reflector is also possible. However, this approach requires more advanced parts and installation skills.
If your location has overlapping coverage from the Telstar 18V C band and Ku band beams, note these are two different beams out of the same satellite. In principle, you could use a single dual-band (C and Ku) combo LNB if you were able to find one. However, such combo LNB models usually select one band or the other (C or Ku) instead of outputting both bands simultaneously. Hence, they are not sufficient for a dual-satellite setup. Thus, we recommend installing two independent antennas with independent LNBs instead. The Pro Kit already comes with C and Ku band LNBs (see the parts list), so you only need to purchase two dishes (and a few cables) in addition to the kit.
You also need two receivers for a dual-satellite setup, each connected to an LNB. The only exception is if your receiver is the Novra S400 of the Pro Ethernet Kit. This model supports dual satellite connectivity by offering two independent radio-frequency (RF) channels. Otherwise, if using a Sat-IP, USB, or SDR-based receiver (or combinations of them), you need two receiver units, each connected to a different antenna/LNB. If using the Satellite Base Station (an integrated receiver-antenna), you also need two units, each pointing to a distinct satellite.
Host Configuration
Once you have the required hardware parts, the next step is to configure the receivers using the host computer. To do so, regardless of the adopted hardware, you must create separate configuration files for each receiver. Then, you can execute commands independently (for each receiver) by switching the configuration file.
With the GUI, you can do so by opening two GUI instances and creating or loading distinct configurations on the Settings sub-tab of the Receiver tab, as shown below:

With the CLI, you can create multiple configurations using option --cfg. For example, you can set up a second configuration named rx2 as follows:
blocksat-cli --cfg rx2 cfg
After that, for every CLI command intended for the second receiver, you should specify --cfg rx2 on the command, as detailed next.
Novra S400 Standalone Receiver
With the Novra S400, you need to configure the two RF interfaces of the device. Each interface will be connected to a different antenna, receiving from a different satellite.
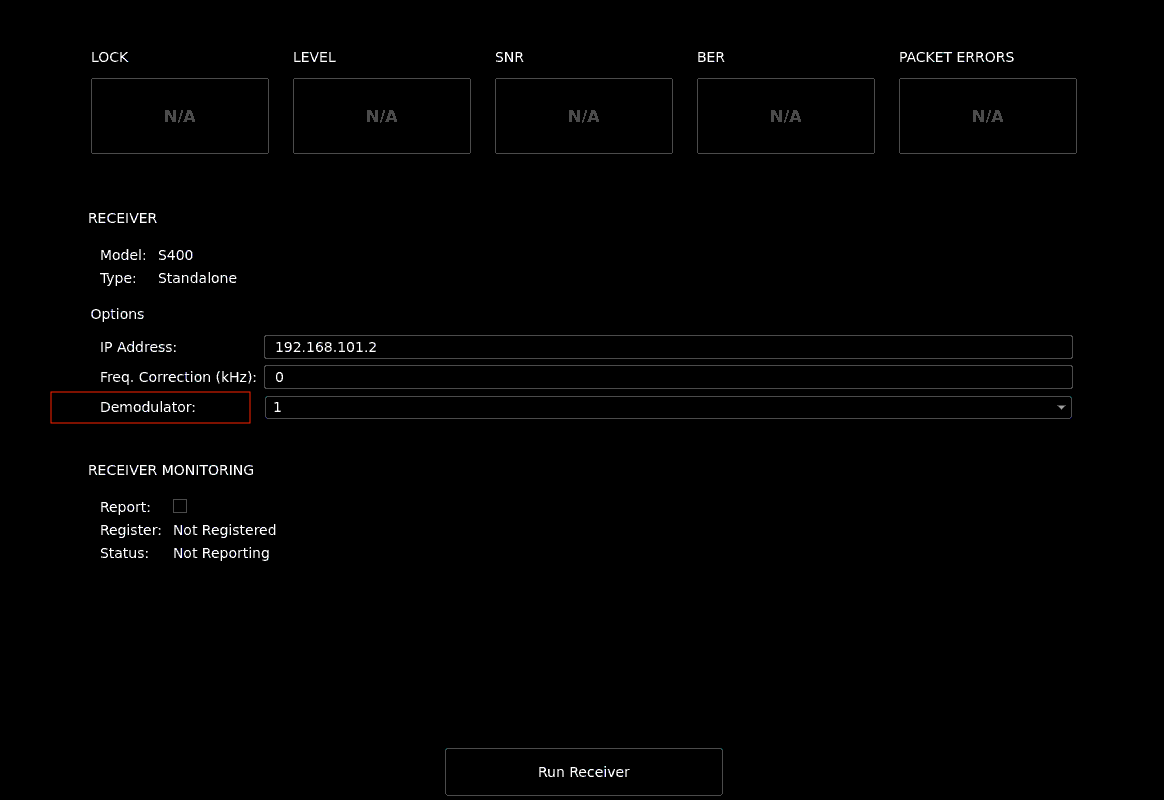
If using the GUI, you need two instances of the GUI, one configured for Demodulator 1 (RF1) and the other for Demodulator 2 (RF2). You can do so by configuring the option highlighted below on the Receiver tab:

Then, start the receiver as usual by clicking on the “Run Receiver” button.
With the CLI, the first RF interface (RF1) is configured by the following command:
blocksat-cli standalone cfg
Then, run the following command to configure the second RF interface:
blocksat-cli --cfg rx2 standalone --demod 2 cfg --rx-only
Note: The
--rx-onlyoption avoids repeating the configurations applicable to the host, which are the same regardless of the receiver. It skips those and configures the receiver only.
After that, you can monitor the two interfaces with the following commands:
blocksat-cli standalone monitor
blocksat-cli --cfg rx2 standalone --demod 2 monitor
Lastly, see the Bitcoin Satellite configuration instructions for dual-satellite reception.
TBS USB Receiver
With TBS 5927 or 5520SE USB receivers, you need to configure and launch the two receivers separately.
With the GUI, you can do so by opening two GUI instances and configuring them for each USB receiver and satellite. Then, start the receivers independently.
With the CLI, you would ordinarily run the following sequence of commands:
blocksat-cli usb config

blocksat-cli usb launch
To use a second TBS unit as the second receiver of a dual-satellite setup, you need to repeat them while including argument --cfg rx2, as follows:
blocksat-cli --cfg rx2 usb config

blocksat-cli --cfg rx2 usb launch
Make sure to select the second TBS 5927/5520SE unit on both steps.
Lastly, see the Bitcoin Satellite configuration instructions for dual-satellite reception.
Blockstream Base Station Sat-IP Receiver
With the Satellite Base Station Sat-IP receiver, you need two base station devices for a dual-satellite setup. Also, when launching the Sat-IP client, you need to select the correct receiver by IP address.
With the GUI, open two GUI instances and load the two Sat-IP receiver configuration files, one for each satellite. Then, go to the Receiver tab in each and configure the antenna (Sat-IP server) IP address differently. Then, start the receivers as usual.
With the CLI, run the first Sat-IP client and select the correct receiver when prompted:
blocksat-cli sat-ip
Next, launch the second Sat-IP client and, again, select the appropriate receiver:
blocksat-cli --cfg rx2 sat-ip
SDR Receiver
With the SDR setup, you need two RTL-SDR devices to receive from two satellite beams. Additionally, you must pick the appropriate RTL-SDR device index when running the receivers.
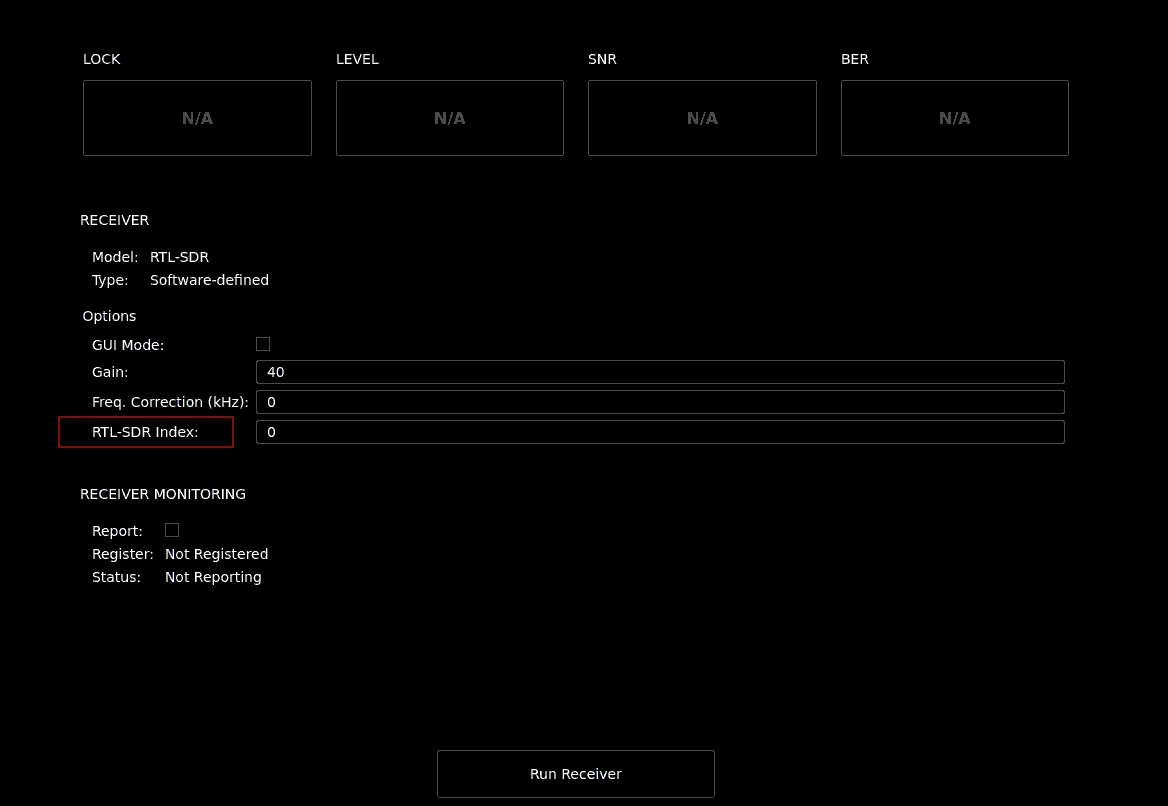
If using the GUI, open two GUI instances and load the two SDR configuration files, one for each satellite. Then, go to the Receiver tab in each and specify the RTL-SDR index on the option highlighted below. Typically, you will need to set the index as 0 on one GUI instance and 1 on the other. Then, start the receivers as usual.

With the CLI, you can run the two receivers by switching the configuration file and the RTL-SDR index as follows:
blocksat-cli sdr --rtl-idx 0

blocksat-cli --cfg rx2 sdr --rtl-idx 1
Lastly, see the Bitcoin Satellite configuration instructions for dual-satellite reception.
Bitcoin Satellite Configuration
Finally, you need to configure Bitcoin Satellite to receive the second satellite stream.
With the GUI, you can do so by concatenating the generated bitcoin.conf files. If you have not generated any bitcoin.conf file yet, using the GUI instance associated with your first receiver, go to the Settings tab, open the Bitcoin dropdown menu, and select “Create configuration file,” as shown below:

Next, do the same on the second GUI instance (associated with the second receiver). The GUI should identify that a bitcoin.conf file already exists. Then, select “Concatenate” on the window that pops up.
With the CLI, you can concatenate the configuration for the second receiver by running:
blocksat-cli --cfg rx2 btc --concat